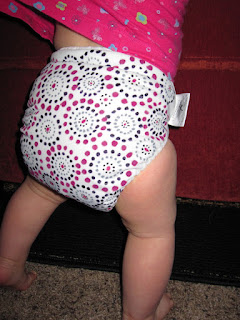
1. Wash diapers/fabric and dry to be sure nothing will shrink. That way, your design will stay put.
2. Find something to help the diaper stay flat. I shoved a book in there, but be careful of sharp objects, as they may scratch through your pull shell, making the diaper useless. Maybe wrap a book's edges with a washcloth or something soft to prevent this. I also tried a bent wire and plastic hanger on my second diaper. That seemed to stretch the diaper the full length and I felt worked a lot better. I made sure the poky parts were covered with something soft.
3.
Place your stencil. Secure stencil with tape. On my second diaper, I
actually took a pen and traced the stencil on the diaper, removed the
stencil plastic after tracing and then painted from the pen marks. That
seemed to work okay too. I found that if you don't have the stencil
flush against the diaper, the paint bleeds underneath the stencil lines
and your shape kind of globs together underneath the stencil plastic if
you are not careful. My first diaper did, but not enough for me to
really tell or care.
4.
Mix one part medium to two parts paint. I used old baby food jars to
mix and keep the paint colors I mixed. Choose your paintbrush. Have a
cup of water and old fabric to wipe off excess paint, clean your brush,
etc.5. Start painting!
6. When finished, carefully and slowly peel the stencil away from the diaper. Be careful NOT to lay the stencil back down once lifted as this may cause unwanted paint to go onto the diaper.
7. Let dry completely. Then, to set the color permanently, throw in the dryer for a good 20 minutes on the highest heat setting you can. Wash cold. Wash hot. Dry. Done!
Second diaper! Instead of stenciling directly onto the diaper, I traced the stencil onto the diaper and painted over the tracing.
YAY!


You are amazing!!! Love it, love it, love it! Jen
ReplyDeletehi! just wondering how they held up?
ReplyDeleteGreat Idea! I make and sell cloth diapers so I am curious to see how these held up.
ReplyDelete